Must-Have Kitchen Tools That are Less Than $15

It’s easy to stare with envy at expensive kitchen gadgets that make your home feel restaurant-level. Even as you fill your wishlist and save up for those, you can add a few dollars to your kitchen tool collection. These simple gadgets can cut down on prep time, make cleaning easier and even elevate the simplest recipes. Stocking your kitchen doesn’t have to break the bank.

Joseph Joseph 2-In-1 Collapsible Balloon and Flat Whisk

Whisks by nature take up a lot of valuable space in your utensil drawer, but this foldable whisk collapses for easy storage. It’s dishwasher safe and made of silicone-coated steel to save your nonstick cookware from scraping metal. With a twist of the handle, it goes in between a balloon whisk for fluffy egg whites or a flat whisk for blending gravy ingredients.

OXO 3-in-1 Egg Separator

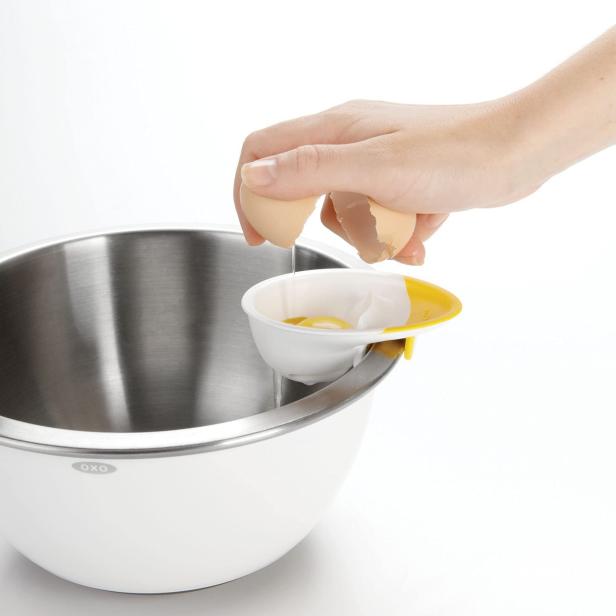
This compact egg-shaped separator is dishwasher-safe and made for breakfast or baking. It hooks onto the side of a bowl to prevent dripping on the counter or the sides of your favorite pan. The separator comes with a plastic nub for easy cracking. Egg whites fall into a bowl while the yolk is saved, and this gadget prevents egg shells from falling in.

Angry Mama Microwave Steam Cleaner

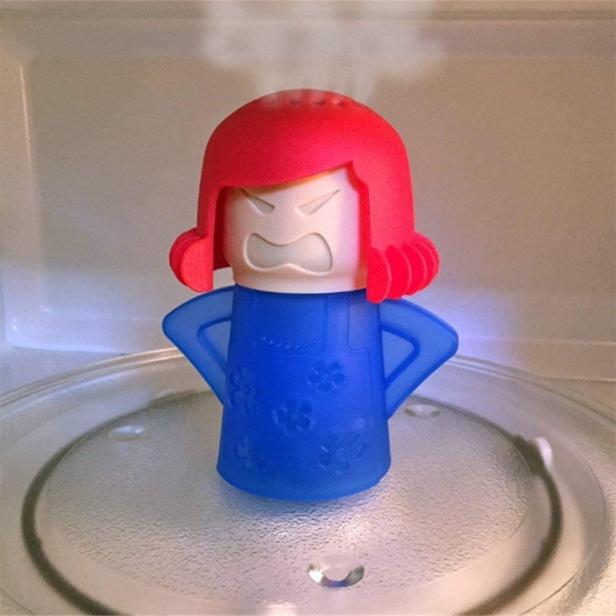
Microwave grime can build up over time, and it’s easy to forget to clean it between uses. Rather than make a mess with a soapy sponge or scrub too hard with a wipe, this microwave cleaner provides an easy solution with natural ingredients. Simple household vinegar and water converts to steam in the cleaner, treating caked-on stains. Wipe away pasta sauce, grease and whatever else graces your microwave with ease.

Collapsible Splatter Guard & Colander

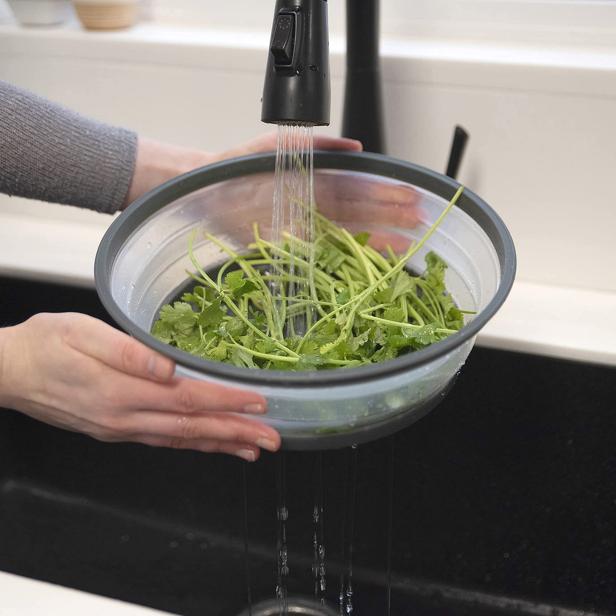
Prevent those microwave messes in the first place with this splatter guard. There’s nothing like a multipurpose kitchen tool. The vent holes at the top of the guard allow steam to escape, but turn it upside down and it becomes a colander for rinsing fresh produce. Plus, it’s collapsible for easy storage in a narrow space.

Meat and Potato Masher

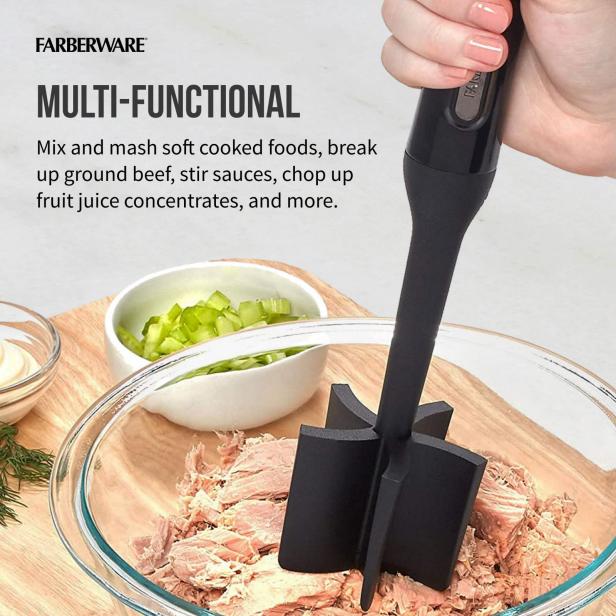
Decrease time spent crumbling meat at the stove with this five-blade spatula. Meat won’t stick to it like it would to a wooden spoon, and its heat resistant nylon saves your nonstick pans and cast irons from metal utensil scratching. The spatula is family gathering friendly, so you can make mashed potatoes, crumble pounds of sausage, tenderize steak or mash avocados for a smooth guacamole.

Silicone Trivets

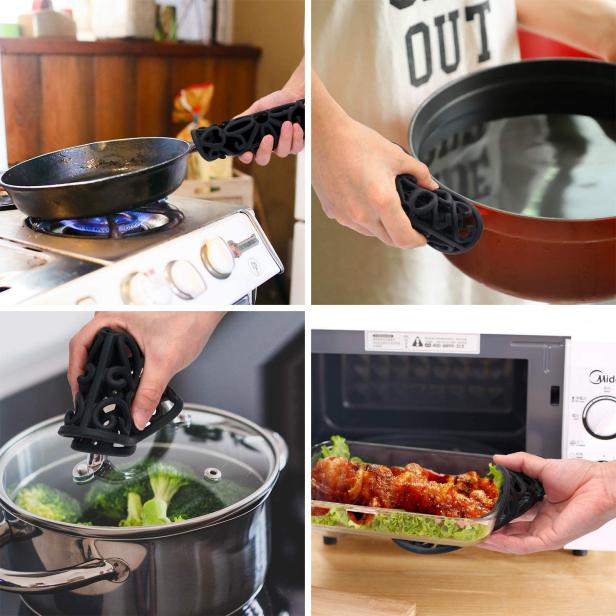
Trivets are an essential for any stovetop cooking. Many countertops are made of material not designed to handle heat, such as marble. These trivets keep pans from being placed directly on the countertop. When not using it for pots and pans, it can be a spoon rest or a jar opener, and its intricate design adds an elegant touch to your kitchen.

Kitchen Sink Splash Guard

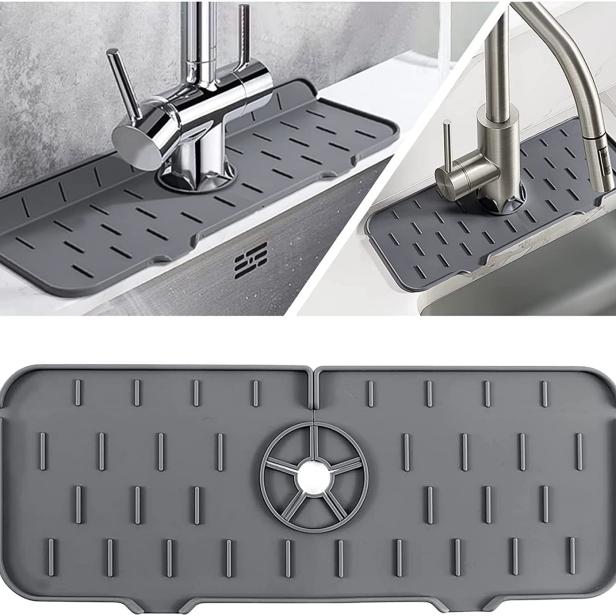
The splash zone around your kitchen faucet can be an annoying thing to dry, not to mention an area for bacteria to grow. This splash catcher is designed to drain, keeping water and bacteria from collecting around your faucet. This washable silicone mat fits snug around the faucet for a neater sink and comes with grips as the perfect surface for sponges and soap to rest, drain and dry.

Joseph Joseph BladeBrush Knife and Cutlery Cleaner

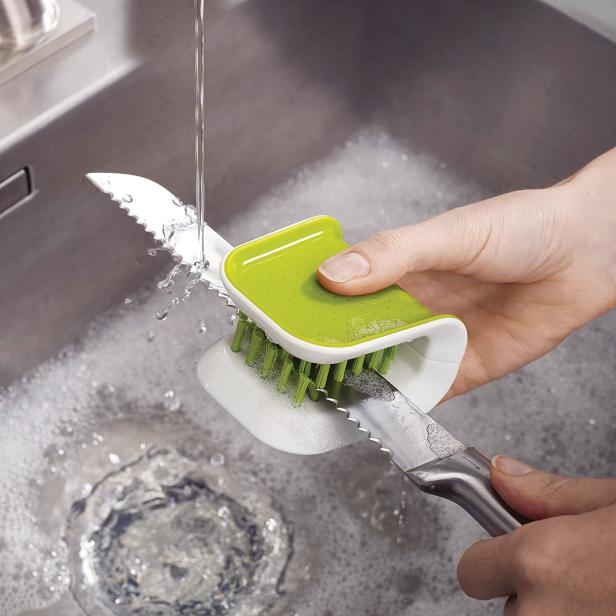
Cutlery might take less time to wash than pots, pans and plates, but getting in the nooks and crannies of forks can be easier with this blade brush. Use it to clean knives and protect your hands from the blade for a thorough, safe clean. Avoid slicing open sponges with this brush with bristles that make cleaning the cutlery a breeze. The textured handgrip claims to provide steadiness when dealing with soaking wet cutlery.

Zulay Milk Frother

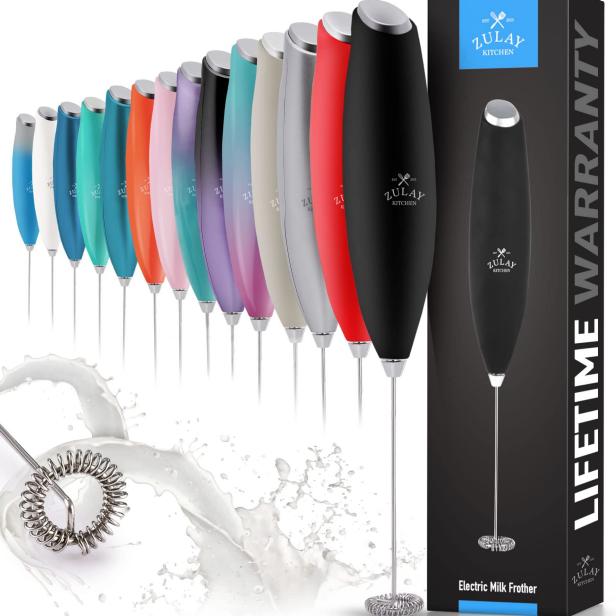
Upgrade your home barista skills with this easy-to-use milk frother. Whether you’re using it for morning matcha, powdered greens or milk foam on coffee (or an extra fancy hot cocoa). You can even use milk frothers to create Instagram-worthy syrup patterns in your glass. The frother claims to work on all milk types, so go wild with the alternative of your choosing.

Best Meal Prep Containers

If you like to plan your meals ahead of time, chop and portion your produce the moment you get home from the grocery store, or simply like to have all of your ingredients parsed out mise-en-place style when cooking, prepping containers may be some of your most-used kitchen tools. We shopped for the best meal prep containers in 11 categories to ensure you have the best supplies in your kitchen. Here are our top picks for lunch containers, snack containers, and more.

Best Overall: Zoku 11-Piece Neat Stack

Space-saving and easy-to-organize features should be top of mind when choosing meal-prep containers (or really any type of storage container). This brings us to our overall favorite. Their nesting design allows them to stack compactly, which is ideal for saving space, and the fact that they’re leak-proof with airtight lids is an added bonus. Another feature that earns these containers our top rating is that they are labeled with specific cup measures, allowing you to customize your portions.

Best for Lunches: Brabantia Make & Take Lunch Set

Whether you’re heading into the office or staying at home, having your lunch prepped and portioned makes for a quick mid-day meal. This lunch set’s rectangular container is ideal for a jumbo sandwich, and the soup mug has an additional screw-on container for toppings. It’s a versatile container set designed to fit daily lunches, no matter what they look like on any given day.

Best Bento: Bentgo Bento Box

If you like having a variety of lunch options, this leak-proof Bento Box will not disappoint. There will be no spills and no chance for items to merge from section to section thanks to a removable divider that allows you to create custom compartments and a secure locking clip. Also, congratulations on the color scheme. The mint green version is our favorite!

Best Container Set: FullStar 50-Piece Food Storage Container Set

If you’re the type of home cook who worries about not having enough food storage containers, FullStar’s 50-piece set (also available in 10, 14, and 17 pack sizes) will make you happy. You can put these in the fridge, freezer, and microwave, they’re stain-resistant and dishwasher-safe, and our favorite feature is that they come with black labels and a chalk pen so you know exactly what’s inside.

Best for Prepped Ingredients: Rubbermaid Brilliance 12-Piece Food Storage Set

This set ensures that your on-the-go meals will stay fresher for longer. Furthermore, these 100% leak-proof containers have an airtight seal, are BPA-free, and are stain- and odor-resistant, making them ideal for storing tomato sauce or any recipe that calls for garlic and onions.

Best Glass: OXO Smart Seal Glass Container Sets

These glass containers were created to be easily transferred from the freezer to the microwave, dishwasher, and even the oven. Furthermore, the interchangeable lids (another feature we appreciate) separate from the elastic liner, making them simple and effective to clean. With this level of adaptability, you’ll be able to get food on the table faster while also keeping it hot.

Best Insulated: Hydro Flask Insulated Food Jars

With Hydro Flask Jars, your road trip sandwich days are over. These are double-walled, vacuum-insulated containers that keep hot foods hot for hours. Made from pro-grade stainless steel, these wide-mouth, BPA-free jars are a must-have if you’re planning on slurping soup on the road.

Coconut Bunny Butt Cake

This cake’s dense pound cake-like texture, which is beneficial for securing the cupcakes and decorating, comes from the inclusion of crushed pineapple in the batter. The cakes and cupcakes can be baked and wrapped in plastic wrap a day in advance. If your frosting effort isn’t flawless, don’t worry; coconut-coating the cake will cover up any imperfections.

Ingredients:

2 large eggs plus 4 egg whites, at room temperature

3/4 cup cream of coconut

1/2 cup drained crushed pineapple

2 teaspoons coconut extract

1 teaspoon pure vanilla extract

2 1/4 cups all-purpose flour, plus more for the bowl (see Cook’s Note)

1 cup sugar

2 teaspoons baking powder

1/2 teaspoon fine salt

12 tablespoons (1 1/2 sticks) unsalted butter, cut into pieces, at room temperature, plus more for greasing bowl

Coconut Buttercream:

3 cups confectioners’ sugar, sifted

2 sticks unsalted butter, at room temperature

1 to 2 tablespoons milk

1 teaspoon vanilla extract

1/2 teaspoon coconut extract

Decoration:

Thin pretzel sticks, for securing the cupcakes

One 10-ounce bag sweetened shredded coconut

8 drops green food coloring

2 large round chocolate candies, such as Candy Melts

6 chocolate chips

Mini candy-coated chocolate eggs, for garnish

5 dried apricots

3 gummy leaf candies

Directions:

Special equipment: an 8-inch (1 1/2 quart) ovenproof metal bowl; a muffin tin with paper liners

  • Set the oven’s temperature to 325 F. An 8-inch (1 1/2 quart) ovenproof metal bowl should be butter and floured. Place paper liners in 4 muffin tins.
  • In a big basin, whisk the egg yolks and egg whites for the cake. The cream of coconut, pineapple, coconut essence, and vanilla extract should all be whisked in at this point. In a separate big basin, stir together the flour, sugar, baking powder, and salt. With an electric mixer set to low speed, incorporate the butter one piece at a time until the mixture resembles coarse meal. Add half of the egg mixture, and beat for 1 to 2 minutes on high, until frothy. When incorporating the remaining egg mixture, scrape down the bowl’s sides as necessary. The remaining batter should be poured into the prepared bowl after filling each muffin cup two-thirds full. For the cupcakes, bake for 18 to 20 minutes, and for the bowl, bake for 1 hour 30 to 1 hour 40 minutes, or until a cake tester inserted in the center of each cake comes out clean. After removing the cakes from the pans, allow them to cool for 15 minutes on a wire rack before turning them out to finish cooling.
  • To make the buttercream, use an electric mixer to combine the butter and confectioners’ sugar on low speed. Then, increase the speed and beat for one to two minutes, or until the mixture is light and fluffy. For an additional 2 to 3 minutes, beat in 1 tablespoon of milk, the vanilla, and the coconut extracts. If the frosting is too stiff, add up to 1 tablespoon more milk.
  • Trim the flat bottom of the bowl-shaped cake with a serrated knife so it rests level on a platter, rounded-side up, and cover with a layer of buttercream frosting. To create the bunny’s feet, remove the cupcake wrappers and secure 2 of them with a pretzel stick each to the cake’s base (allow about 1 1/2 inches between the feet). The third cupcake should be divided in half, top to bottom. With the cut side facing down and the rounded edges positioned to form the heels of the feet, attach the cupcake halves to the tops of the feet with pretzel sticks. To create a tail, attach the final cupcake with a pretzel stick to the bottom half of the cake’s top. With the remaining frosting, frost the cupcakes. Wipe away any smeared frosting on the cake plate.
  • 1 1/2 cups shredded coconut should be patted all over the cake. Place the rest of the coconut in a large zip-top plastic bag. Add the green food coloring to the bag along with 2 teaspoons of water. Toss and massage the coconut until it is a uniform shade of green. Place the chocolate candies in the bottoms of the bunny feet, with the larger ones on top and the smaller ones underneath, to resemble the toe pads. Make grass out of green coconut and decorate with candy eggs on the cake plate. Roll the apricots into carrot shapes after flattening them with a rolling pin. Cut the leaves in half crosswise and snip them to look like carrot tops with scissors. Arrange the carrot tops in the grass around the bunny by inserting them into the wider end of the apricot carrots.

Baker’s Note:

When we measure flour, we spoon it into a dry measuring cup and level it off. (Scooping the flour directly from the bag compacts it, resulting in dry baked goods.)